Friday, April 1, 2016

Ora2pg Installation

Ora2pg Installation

Install following dependencies on your system before installing the ora2pg

1)         Perl distribution (perl 5.6 and above)
2)         DBI (database interface module)
3)         DBD::Oracle Perl module
4)         DBD::Pg  Perl module (if you don’t have postgres installed on your system ).


Install Oracle Client On CentOS
First Download the packages from net:

            oracle-instantclient11.2-basic-11.2.0.4.0-1.x86_64.rpm
            oracle-instantclient11.2-sqlplus-11.2.0.4.0-1.x86_64.rpm
            oracle-instantclient11.2-devel-11.2.0.4.0-1.x86_64.rpm

Go to the location and run the Following comments:
            rpm -ivh oracle-instantclient11.2-basic-11.2.0.4.0-1.x86_64.rpm
            rpm -ivh oracle-instantclient11.2-sqlplus-11.2.0.4.0-1.x86_64.rpm
            rpm -ivh oracle-instantclient11.2-devel-11.2.0.4.0-1.x86_64.rpm

Then configure the TNSNames.ora file:
            tnsnames.ora file is used to store database connection information.
            This file must be created and configured in your current client installation.

To do this, first create your network/admin directory
            [root@dinesh ~]# mkdir /usr/lib/oracle/11.2/client64/network/admin -p

Using the following touch command we create the TNSNames.ora file in the Destination:
            cd /usr/lib/oracle/11.2/client64/network/admin
            touch tnsnames.ora

Edit the file using vi file name:
            vi tnsnames.ora

The edit session opens and give 'I' to edit, and give the following details:
            ORATST=
            (description=
              (address_list=
               (address = (protocol = TCP)(host = 172.16.12.244)(port = 1522))
             )
            (connect_data =
              (service_name=orcl1)
            )
            )
Then press esc and ':wq' for write and exit.

Then we open the file and check using the following command:
            cat tnsnames.ora

Then Configure the ORACLE Environment Variables:
Create file /etc/profile.d/client.sh with the following file content
            cd /etc/profile.d/
            touch client.sh
            vi client.sh
Then give the details
            export ORACLE_HOME=/usr/lib/oracle/11.2/client64
            export PATH=$PATH:$ORACLE_HOME/bin
            export LD_LIBRARY_PATH=$ORACLE_HOME/lib
            export TNS_ADMIN=$ORACLE_HOME/network/admin
and write and exit from the file.

After the ORACLE client installation we going to Install DBD::Oracle:

            Download DBD::Oracle from http://search.cpan.org/ (Give DBD::Oracle in the search tab and download the recent updated file)

Following the steps in the file location and do the installation steps:
            cd cd /home/dinesh/Downloads/DBD-Oracle-1.74/
            ls
            perl Makefile.PL
            make
            make install
If there is no errors or problems, the DBD::Oracle was successfully installed.

Then Install ora2pg:
            Download the latest version of ora2pg from http://sourceforge.net/projects/ora2pg/

Then go to the file location and run the following steps:

            perl Makefile.PL
            make
            make install


ora2pg Configuration:

By default Ora2Pg will look to ora2pg.conf configuration file into /etc/ora2pg/ directory.
For standalone machine just change the following parameters in ora2pg.conf.

In the .config file, we give the following details:

            ORACLE_HOME    /usr/lib/oracle/11.2/client64
            ORACLE_DSN      dbi:Oracle:host=[172.16.12.244];sid=[orcl1]
            ORACLE_USER     [ee]
            ORACLE_PWD      [mhQBrIXOPYEoWjK9tkVd]
            USER_GRANTS     0

After the configuration we have to create a folder for our Project.
            mkdir -p /home/git/tmp

Then we create the project inside the folder.
            ora2pg --project_base /home/git/tmp --init_project test_project

Then we go to the project path and edit the export_schema.sh file:
            cd /home/git/tmp/test_project/config/
            vi ora2pg.conf

We edit the configurations in the specified file, the changes like:

ORACLE_DSN
dbi:Oracle:host=mydb.mydom.fr(172.16.12.244);sid=SIDNAME(orcl1);port=1522    
-- (If our port is        1521 this is not mandatory, otherwise we have to mention this)
       ORACLE_USER       system(accesscontrol)
       ORACLE_PWD                     manager(rKvuaBoLsq_kwn4P8pcx)

        SCHEMA       CHANGE_THIS_SCHEMA_NAME(accesscontrol)

Write and exit.

Then we have to export schema from Server to ora2pg using this:
            ./export_schema.sh

After exporting schema we have to export the data using the following command:
            ora2pg -t COPY -o data.sql -b ./data -c ./config/ora2pg.conf

Then we import the data from ora2pg to local Postgres DB using import command:
            ./import_all.sh -d healthentic(DB Schema) -o postgres(Owner) -U healthentic(User)

Then we give the needed categories 'yes' and import the data.

Migrate specific Tables:

If we want to migrate some specific tables, we do some configuration changes in the ora2pg.conf file.

In the export section, uncomment the ALLOW part and give the table names which we want to migrate separated with space or comma(,).

(i.e)

ALLOW  CUSTOMER,APP_USER APPLICATION,CUSTOM_COLOR

Then we run the command, the given tables only exported:
 ./export_schema.sh

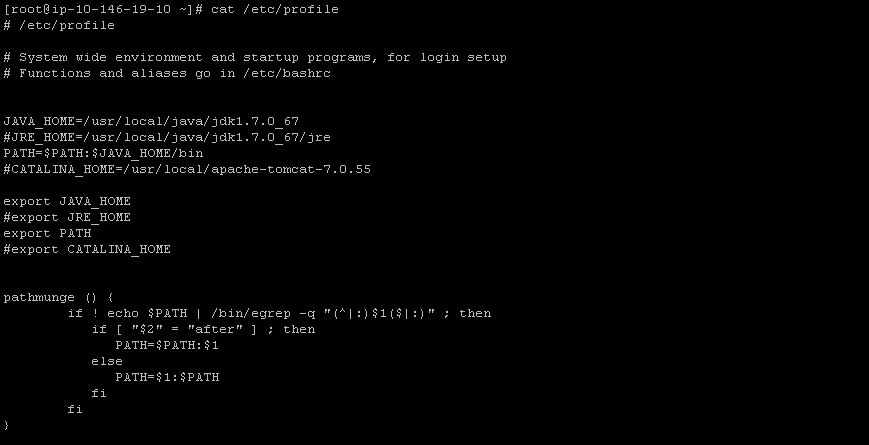
SET JAVA_HOME IN LINUX


Go to Terminal 
 vi  /etc/profile 


insert the java_path profile file

JAVA_HOME=/usr/local/jdk1.6.0_27
PATH=$PATH:$JAVA_HOME/bin
CATALINA_HOME=/usr/local/tomcat-7.0.20

export JAVA_HOME
export PATH
export CATALINA_HOME


Profile File in /etc/profile


[root@monitoring ~]# cat /etc/profile
# /etc/profile

# System wide environment and startup programs, for login setup
# Functions and aliases go in /etc/bashrc

# It's NOT a good idea to change this file unless you know what you
# are doing. It's much better to create a custom.sh shell script in
# /etc/profile.d/ to make custom changes to your environment, as this
# will prevent the need for merging in future updates.

JAVA_HOME=/usr/local/jdk1.6.0_27
PATH=$PATH:$JAVA_HOME/bin
CATALINA_HOME=/usr/local/tomcat-7.0.20

export JAVA_HOME
export PATH
export CATALINA_HOME


SET JAVA_HOME IN WINDOWS WITH SCREEN SHOT ..

1). After the installation set the JAVA_HOME property.


2). Set Path property


3). verify java and javac command in command prompt


if command gets failure, your environment variable has not been set properly.

Install SVN (Subversion) Fedora 18/17, CentOS/Red Hat

Install SVN (Subversion)  Fedora 18/17, CentOS/Red Hat 
i) Requirementsi. apache server
install apache server in fedors systems --yum install httpd

start the apache servers command in linux : service httpd
start/restart (or) /usr/sbin/apachectl start/restart
ii) install in subversionii) Svn “Subversion server”
install Subversion server in fedora systems : --yum install
mod_dav_svn subversion
not started in svn server the server based on the httpd/apache server
so u only start in apache server. svn is automatically running.
iii) Start the installation:1. Change the root user
su - (or) sudo -i
iv) install the need packages (mod_dav_svn subversion)yum install mod_dav_svn subversion
v) Modify the subversion config file /etc/httpd/conf.d/subversion.confAdded the the following lines.
LoadModule dav_svn_module modules/mod_dav_svn.so
LoadModule authz_svn_module modules/mod_dav_svn.so

<Location /svn>
DAV svn
# Access Control via the authz module.
AuthzSVNAccessFile /etc/svn-access
------#-- u set the permission in these file /etc/svn-access followlink ------#http://csoft.net/docs/svndav.html.en
SVNparentpath /var/www/svn
AuthType Basic
AuthName “subversion repositories”
AuthUserFile /etc/svn-auth-users
Require valid-user
</Location>
vi) Added the Svn-Sub Usershtpasswd -cm /etc/svn-auth-users testuser(username in svn)

New password :
Re-Type New password:
htpasswd -cm /etc/svn-auth-users testuser
New password :
htpasswd -cm /etc/svn-auth-users testuser
New password :
Re-Type New password:
Adding the password for user testuser
vii) Create and Configure SVN Repositorymkdir /var/www/svn
cd /var/www/svn

svnadmin create testrepo
chown -R apache.apache testrepo
## If you have SELinux enabled (you can check it with "sestatus" command) ##
## then change SELinux security context with chcon command ##
chcon -R -t httpd_sys_content_t /var/www/svn/testrepo
## Following enables commits over http ##
chcon -R -t httpd_sys_rw_content_t /var/www/svn/testrepo
vii) Restart the Apache/etc/init.d/httpd restart
/etc/init.d/httpd start
service httpd restart the following the commands in your terminal
xi) Gotohttp://localhost/svn/testrepo now installing the svn
(using ip or http://localhost/svn/testrepo)
Successful installed subversion..

Pentaho Configuration in Linux

Pentaho Configuration in Public Server IP


Step 1:


Install Mysql Server on the system


Start Mysql Server using 
[root@localhost ~]# service mysqld start


Before importing sql file you need to create database in mysql server.


for example:  
create database adventureworks;


Then import sql file using this command,
[root@localhost ~]# mysql -u root -p  database-name < ~/ url / sql file


for example:[root@localhost ~]# mysql -u root -p  adventureworks2012 < ~/Desktop/ adventureworks.sql


Get adventureworks2012.sql file from 172.16.12.10/March/Users/Anandh/Pentaho


Step 2:
Open pentaho biserver-ce tomcat webapps and copy java war file named as PentahoSampleApp.war from 172.16.12.10/March/Users/Anandh/Pentaho after copying a file refresh to see the folder with the name of “PentahoSampleApp”.


Step 3:

Start Pentaho Business Intelligence server using terminal


  1. In system terminal use su – for root user
[root@localhost ~]# su -
  1. Navigate to that folder
[root@localhost ~]# cd /usr/local/pentaho/biserver-ce
  1. To list files in present on that folder use ls command
[root@localhost biserver-ce]# ls


  1. To start pentaho server use below command
[root@localhost biserver-ce]# sh start-up.sh
DEBUG: Using JAVA_HOME
DEBUG: _PENTAHO_JAVA_HOME=/usr/local/java/jdk1.7.0_80
DEBUG: _PENTAHO_JAVA=/usr/local/java/jdk1.7.0_80/bin/java
Using CATALINA_BASE: /usr/pentaho/biserver-ce/tomcat
Using CATALINA_HOME: /usr/pentaho/biserver-ce/tomcat
Using CATALINA_TMPDIR: /usr/pentaho/biserver-ce/tomcat/temp
Using JRE_HOME: /usr/local/java/jdk1.7.0_80
Using CLASSPATH: /usr/pentaho/biserver-ce/tomcat/bin/bootstrap.jar
  1. Pentaho server is started.


After pentaho server is started. Goto browser and using this URL http://localhost:8080/pentaho you can reach pentaho login screen.


Username: Admin
Password: password
Browse Files Home admin Upload ( under Folder Actions) and browse to select zip file.

Step 4:
Goto browser and using this URL http://localhost/PentahoSampleApp and you can reach pentaho HelloWorld.jsp page. Click on Mysql Dashboard menu to see the sample dashboard.

ls -lls -l /etc /bin

List the files in the /bin directory and the /etc directory in long format

Tuesday, August 25, 2015

Linux file system structure

Linux Operating System and Linux File System are totally different from Microsoft Windows. In Microsoft Windows, you usually see Windows is installed in C:\ drive. In Linux, the Filesystem Hierarchy Standard (FHS) defines the structure of file systems on Linux and other UNIX-like operating systems, everything is configured as a file including directories, partitions, and hardware device drivers. All files and directories will be displayed under the root directory, even if your data is stored on different physical devices. I have explained what is Linux, now let’s dig a little deeper into Linux file system structure.
Linux file system layout
This is a layout file system structure from a CentOS linux, depends on the system and linux distro, the structure may vary, and directories may be removed or added.


/ – The Root Directory

Everything on Linux system is located under the / or root directory. The meaning of / or root and root user are often confusing to new Linux users. In Linux, the root directory “/” (The tree of the file system starts at the trunk or slash, indicated by a forward slash /) is a separator between a file and a directory contains all underlying directories and files, yet root user is a super user or administrator user with has administrative privileges on the system vs Linux privileged users who only have limited privileges to protect system security.

/bin – Essential command binaries
The /bin directory is a place contains most commonly essential executable terminal binaries programs or file required during booting, repairing like cat, ls, mount, rm, du, df, tar, rpm, wc, etc.

/boot – Boot loader files
All of the required files to boot the system contains in /boot directory, including GRUB boot loader’s files, Linux kernels, the Linux initial RAM disk (initrd),

/dev – Device Files
All of the hardware devices on the machine like cdrom, cpu, hard drives, etc will be stored as special device files that represent all the devices in /dev directory. Device files are created during your Linux system installation.

/etc – Configuration Files
Contain host-specific files and directories, e.g. information about system and application configuration files like startup, shutdown, start, stop script for every individual program. In another word /etc data is very similar to Control panel in Microsoft Windows.

/home – Home Directory
Home directory of the users. Every time you create a new user, a new directory with user’s name is created in /home directory for users to store their own files within their own home’s directory. Most common automatic directories created within /home ‘s user are Desktop, Downloads, Documents, Music, Movie, etc. Most programs configuration file for a specific user will be saved in it’s users /home directory like web browser settings, web browser bookmarks, desktop wallpaper, themes, and passwords.

/lib – Essential Libraries
Similar to Windows ‘dll’ files, all Linux shared libraries and kernel modules files stores in /lib directory. These important Linux dynamic libraries are required to boot the system and run commands in the root file system.

/lost+found – Recovering Files
Sounds weird but yes we have lost+found in Linux file system structure. Every Linux file system and partitions has a lost+found in it’s directory. In the even your system is crashed or unexpected shutdown, you can run fsck command to check and repair the filesystem, fsck will turn any corrupted or almost-deleted files back into files that you can recover them later in /lost+found directory.

/media – Removable Media Devices
Every time you insert a removable device such as external hard drive, floppy disk, zip drive, CDs, DVDs, flash drive to a Linux system, a new directory will automatically be created inside the /media directory.
media directory is a temporary mount directory for removable devices.

/mnt – Temporarily mounted filesystems
While /media is where the system automatically mounts removable media, /mnt is for you to mount things (partitions, file systems, devices) manually and temporarily.

/opt – Optional software packages
The /opt directory is reserved to store addition software or extra and third-party software for your system, those addition software usually don’t follow the standard file system hierarchy and not handled by the package manager.

/proc – Kernel & Process Information
Similar to /dev, /proc directory contains information about running process, system resources and information. You can view information about any running process with a specific process-id (pid) or hardware’s information such as memory, cpu, io, etc…

/root – Root Home Directory
Don’t be confused with “/” or root directory, /root is a root account’s home directory determined by developer or local preference rather than /home/root to allow for booting the system even if /home/ is not available. Sometimes /home is located on a different partition or even on another separate system and it’s inaccessible to “root”, that is why “root’s home directory” need to be in the same partition as “/” directory.

/sbin – System binaries
Similar to /bin, /sbin contains essential binaries that are generally intended to be run by the root user for system administration and maintenance purpose. For example: iptables, reboot, fdisk, ifconfig, swapon, init, ip, mount

/selinux – Security-Enhanced Linux
Selinux comes with RedHat based distro (fedora, centos), selinux is a security architecture integrated into the 2.6.x kernel using the Linux Security Modules (LSM). For some reason Centos 6 created an emtpry selinux directory in root directory, the real selinux directory with its configuration files are stored in /etc/selinux/ directory.

/srv – Service Data
Server (srv) contains data of services such as HTTP, FTP, rsync, cvs

/sys – virtual filesystem
Some newer Linux distros have /sys directory with sysfs virtual filesystem to store information and statistics about (physical and virtual) device and device names. /sys is newly added since Linux kernel 2.6 /sys contains similar information with /proc which display device information about the kernel’s view of the system.

/tmp – Temporary files
System’s Temporary Directory, all users and programs in your system can access/read/write in this directory. Most files in this directory are required temporarily. Many programs use /tmp to create lock file to save temporary data or files. Normally don’t delete files from /tmp unless you know what you are doing because most files are required for current running programs.  You should not save or store any important files/directories under /tmp since all files will be removed after system is rebooted.

/usr – binaries, documentation, source code, libraries
Pronounced as ‘user’, /usr contains the majority of user utilities, programs, libraries, documentation etc for all user-related second level programs rather than applications and files used by the system. Some user programs are stored here like telnet, ftp, etc… /usr is shareable between various FHS-compliant hosts but can not be written to.

/var – Variable Files
Variable or /var contains data that is expected to change and grow as the system is running (system log files, mail, printer spool, temporary files). Some sub directories under /var are not shareable between systems like /var/log, /var/lock, or /var/run, while other sub directories are shareable like /var/mail, var/cache/man, var/cache/fonts, and /var/spool/news.